DIY Easy (ish) Wall Shelves
Happy New Year! I can't believe it's 2016! I am looking forward to this being "my year" and our year, because honestly, the last 2-4 years have been pretty rough. I could use some love/success/stability. Not to seem ungrateful for the amazing relationships and good things that have happened to me, it's just that overall, there has been enough struggling to last a decade, and I would LOVE to just have things make a bit more sense for a while. I know life will always be hard and unpredictable, but some things should make sense. Some things shouldn't be so uncertain, and that's what I'm praying for and hoping for this year.
Anyways! With a new year approaching, I suddenly had the itch to change some things around the house, almost like I get in the Spring...but it's far from Spring here in Washington. It's actually 17 degrees out right now.
Pretty, but way too cold for me. I'm always cold.
So yeah...onto the shelves. I got the inspiration and all instructions from Mandi's awesome DIY blog, Vintage Revivals. Here are hers:

Here are ours!:

I'm so in love with how they turned out! I totally copied her even down to the globe and I don't care. I had a globe sitting around upstairs already so it just seemed meant to be. Anyway, the first hurdle was convincing the husband to help. He sighed a lot, looking through the directions, but eventually decided he wanted to do it, and thank God because there is NO way I could have done it without him. Plus once we were done, he was so proud of himself, it was so cute. I am so proud of him too!
Here is a list of what you'll need (all from Home Depot or your tool kit):
- 12 X 8 shelving brackets

-1/4 " Hex Caps (2 per shelving bracket)

-2" Hex Screws

- 2 " Hex Bolts (2 per bracket)

-A Level

-A Stud Finder

-Painters Tape (ours is so dirty, ewww)

-A cheerleader for the times you want to give up

-wood (we used 1.5" X 38" to fit the wall space)
When measuring your wood, take into account you'll want some overhang. We gave ourselves an extra 1.5 inches on each side.
We just bought pine or birch I believe. It was about $10 and they cut it for us. We sanded it a little at home but not much.
Once you have all the supplies and the wall picked out, you will need to mark your studs. We used pencil and painters tape. We had to settle on a wall that was not our first choice. Not even our second or third choice! But you have to work with where your studs are, and our house is older and nothing makes sense (going back to my life the last few years not making sense...), so we had to be flexible with where the shelves went.
You want to keep in mind the depth of the wood, plus the amount of gap you'll want, and then clearly mark where the final measurements are.
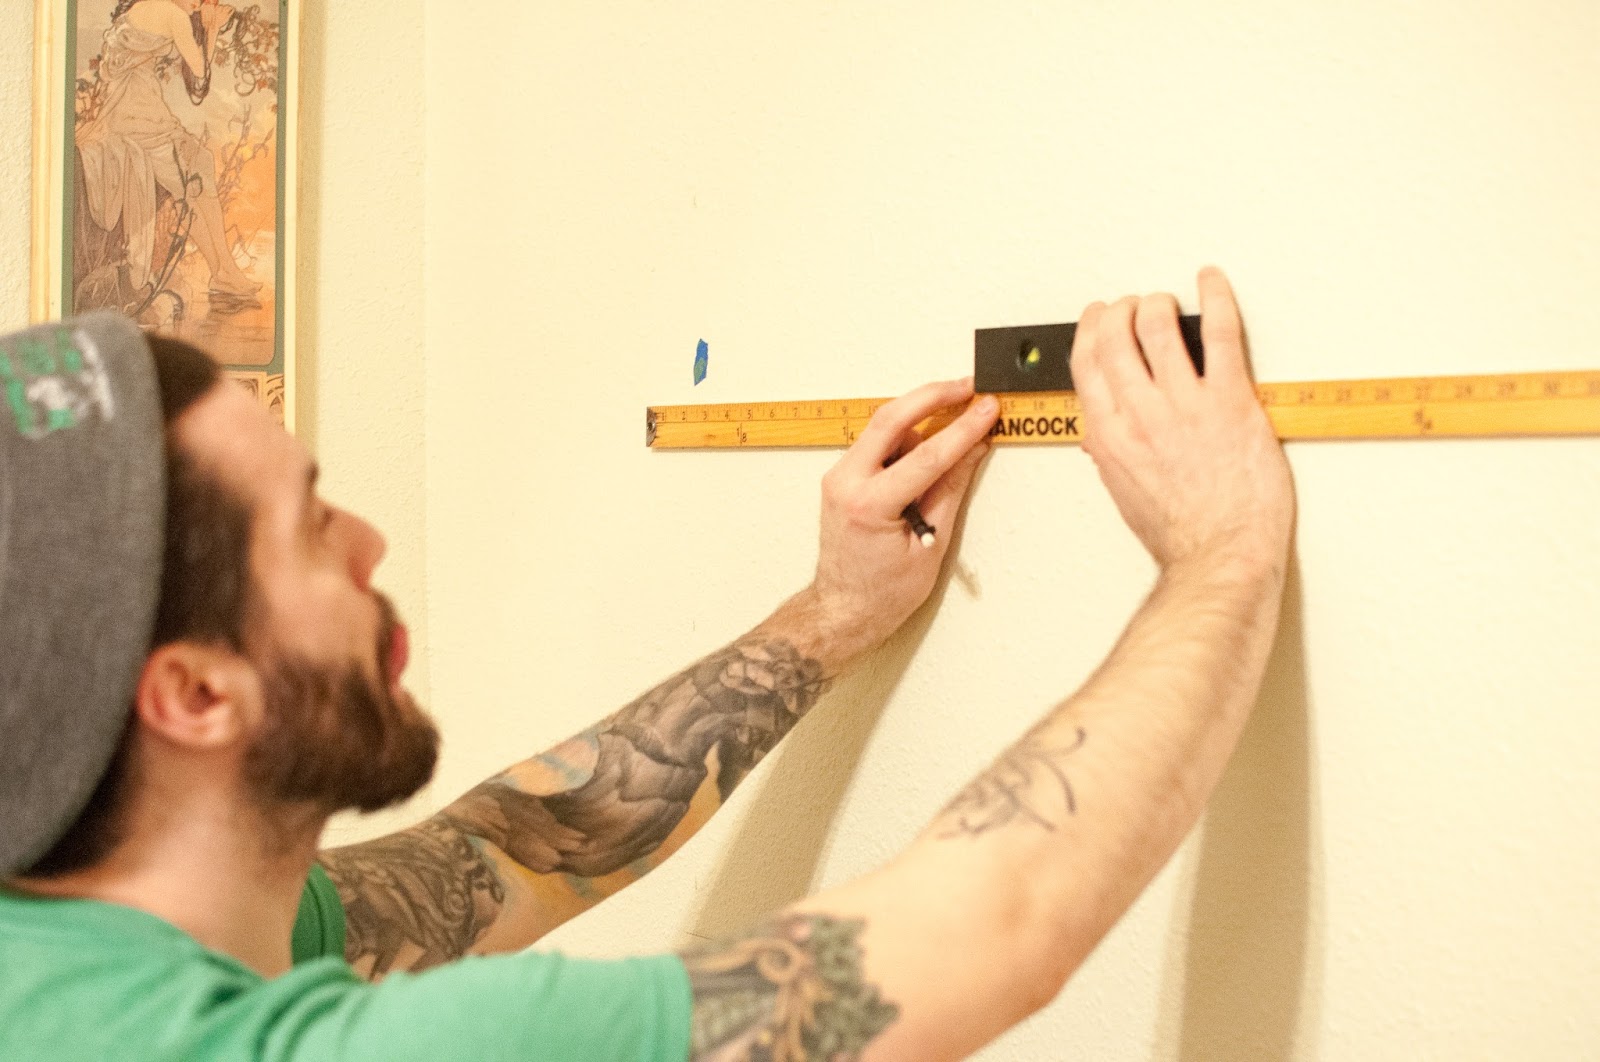

Once everything is marked where it's going to go, you can start drilling!
First drill a pilot hole with a smaller sized drill bit. That way you won't split the stud, plus it just makes things easier. Then screw the brackets in with the hex screws.


Beautiful. Next, mark the wood where you're going to drill and then go ahead a drill. The way we figured out where to drill was by holding the wood up to the brackets and using a pencil to outline the little slots. Definitely a two person job.
Then you can just attach the wood with the hex bolts and caps. This is the easy part. We did use a socket wrench to get them in really tight.


We did this project at night and I patiently waited til morning to take photos of it all decorated. Muuuuch better light!
TA-DAHHH!!!!!!


What do you guys think? I hope you like it! I love to read your comments and questions if you have them, so don't be shy!
Also, I post lots more on instagram, so you should follow!

Thank you so much.
ReplyDeleteHappy new year. May all your wishes come true.